PyAMS Quickstart
Here is a quick list of operations that you can follow to create and start your first PyAMS application from scratch. For this quick start, we will only use the most basic setup and keep several features disabled (like Elasticsearch integration, notifications…).
See Installing PyAMS application to get a full description of installation process.
0. Requirement
Packages
PyAMS relies on system and Python packages which you must have been previously installed in your environment.
Note
- a C/C++ compiler like GCC
- Python 3.5* with development headers; Cython3 for better optimization of several packages
- a cache server, like Redis or Memcached.
- Several libraries with their development headers: libjpeg, libpng, libfreetype, libxml2 and libxslt (and libpq if you want to use PostgreSQL, libldap if you want to use LDAP authentication…).
- PyAMS may be compatible with other versions but has only been completely tested with this version until now.
On a Debian GNU/Linux:
$ apt-get install python3.5 python3.5-dev
$ apt-get install cython3
$ apt-get install redis-server redis-tools
$ apt-get install libjpeg-dev libpng-dev libfreetype6-dev libxml2-dev libxslt1-dev
Initialize virtual environment
We are creating a virtual environment in /var/local/env
$ mkdir /var/local/
$ pip3 install virtualenv
$ virtualenv --python=python3.5 env
$ source env/bin/activate
To use PyAMS templates, the cookiecutter tool is required:
(env)$ pip3.5 install cookiecutter
1. Creating Database
Create ZODB
We are creating a local ZODB using a “ZEO server” cookiecutter template.
Tip
To know more about ZODB storages you can see ZODB server.
Note
In this example, ZEO server instance will run as current UNIX user and group. For a production environment, it’s better to use dedicated service user and group.
Run cookiecutter:
(env)$ cookiecutter hg+http://hg.ztfy.org/pyams/scaffolds/zeo_server
Configuration:
pyams_release [latest]:
project_name [ZEO_server]: ZEO_pyams
project_slug [zeo_pyams]:
eggs_directory [eggs]: /var/local/eggs    # Python eggs will be stored into */var/local/eggs* directory.
run_user [zeo]: mylogin                   # current user ID
run_group [zeo]: mygroup                  # current user group
zeo_server_port [8100]:
zeo_storage [pyams]:
zeo_pack_report [root@localhost]: email@my-domain.com
logs_directory [/var/log/zeo/zeo_pyams]:  # An absolute path is mandatory!!!

Your ZEO environment is initialized.
To finalize it\'s creation, just type:
- cd zeo_pyams
- python3.5 bootstrap.py
- ./bin/buildout
Configuration ZODB
In zeo_pyams folder, execute bootstrap.py:
(env)$ cd zeo_pyams

(env)$ python3.5 bootstrap.py
Creating directory '/var/local/env/zeo_pyams/bin'.
Creating directory '/var/local/env/zeo_pyams/parts'.
Creating directory '/var/local/env/zeo_pyams/develop-eggs'.
Generated script '/var/local/env/zeo_pyams/bin/buildout'.
And then run final buildout:
(env)$ ./bin/buildout

Installing zodb.
Generated script '/var/local/env/zeo_pyams/bin/zeopack'.
Generated script '/var/local/env/zeo_pyams/bin/runzeo'.
Generated script '/var/local/env/zeo_pyams/bin/zeo-nagios'.
Generated script '/var/local/env/zeo_pyams/bin/zeoctl'.
Installing zdaemon.
Generated script '/var/local/env/zeo_pyams/bin/zdaemon'.
Installing zeo_pyams.
zc.zodbrecipes: Generated shell script '/var/local/env/zeo_pyams/etc/init.d/zeo-zeo_pyams'.
Run ZODB server
Start the ZEO server:
(env)$ ./etc/init.d/zeo-zeo_pyams start

Password:
. . .
daemon process started, pid=26230
2. Creating application instance
Application instance will be created in /var/local/env/pyams via another coockiecutter template:
(env)$ cd /var/local/env
(env)$ cookiecutter hg+http://hg.ztfy.org/pyams/scaffolds/pyams
Tip
Configuration
- The variable $((INSTALL)) is the path to current folder; it will be replaced automatically by cookiecutter after application creation
- You will be invited to setup additional PyAMS plugins like Elasticsearch but you must install related services on your own. See also PyAMS additional features and services
pyams_release [latest]:
project_name [PyAMS]:
project_slug [pyams]:
virtual_hostname [pyams.mydomain.com]: pyams.example.com
webapp_name [webapp]:
webapp_port [6543]:
eggs_directory [eggs]:
logs_directory [$((INSTALL))/var/log]:
run_user [www-data]:      # user used to run server and write logs
run_group [www-data]:     # group used to run server and write logs
Select beaker_backend:
    1 - redis
    2 - memcached
Choose from 1, 2 [1]:
beaker_server [127.0.0.1:6379]:
Select db_type:
    1 - zeo
    2 - relstorage
    3 - newt
Choose from 1, 2, 3 [1]:
db_host [127.0.0.1]:
db_port [8100]:
db_name [pyams]: zeo_pyams  # db_name created in step 1
db_username []:
db_password []:
zeo_realm [pyams]:
blobs_dir [$((INSTALL)/var/db/blobs]:
use_postgresql [True]: False
use_oracle [False]:
use_ldap [False]:
use_elasticsearch [False]:
elasticsearch_server [http://127.0.0.1:9200]:
elasticsearch_index [pyams]:
create_elasticsearch_index [False]:
define_elasticsearch_mappings [False]:
smtp_server [localhost]:
smtp_server_name [pyams]:
pyams_scheduler [127.0.0.1:5555]:
start_scheduler [True]:
pyams_medias_converter [127.0.0.1:5556]:
start_medias_converter [True]:
pyams_es_indexer [127.0.0.1:5557]:
start_es_indexer [False]:
use_notifications [True]: False
pyams_ws_notify [127.0.0.1:8081]:
lexicon_languages [en:english fr:french]:
extension_package []:
need_pyams_gis [False]:
Your server environment is initialized.

To finalize it\'s creation, just type:
- cd pyams
- python3.5 bootstrap.py
- ./bin/buildout
In the project’s pyams folder, execute bootstrap.py:
(env)$ cd pyams
(env)$ python3.5 bootstrap.py
Creating directory '/var/local/env/pyams/bin'.
Creating directory '/var/local/env/pyams/develop-eggs'.
Generated script '/var/local/env/pyams/bin/buildout'.
And run final buildout:
(env)$ ./bin/buildout
Note
Packages download, compilation and installation can easily take several minutes. Install errors are generally due to missing libraries development headers.
Tip
See Installing PyAMS application to get more detailed information about installation process.
After buildout, just check INI files in etc directory (see config)
3. Initializing the database
You have to initialize the database to populate PyAMS objects into database. From a shell:
(env) $ ./bin/pyams_upgrade etc/development.ini
4. Starting application
Application is ready to run! Start the application:
(env)$ ./bin/pserve etc/development.ini
...
Starting server in PID 29335.
Serving on http://0.0.0.0:6543
Congrats: PyAMS is running !
Launch a browser and open URL http://127.0.0.1:6543/admin to get access to PyAMS management interface.
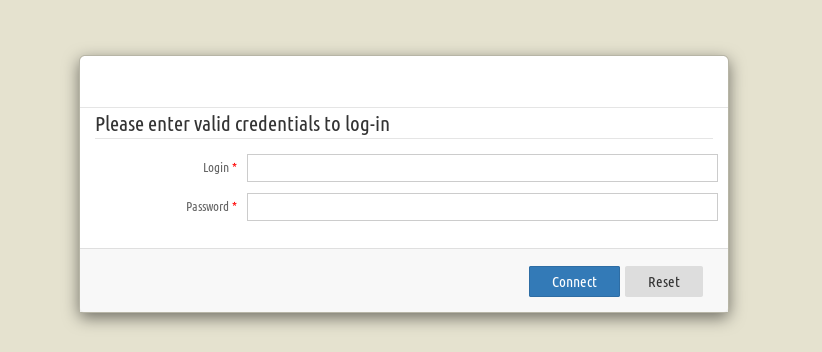
Warning
By default:
- Login: admin
- Password: admin
You must change it as soon as possible! (see pyams_security package ⊞)!!.